

Learn how to make hard boiled eggs perfectly every time! With this easy method, they'll be easy to peel and have vibrant yellow yolks.

Here’s the good news: perfect hard boiled eggs are easy to make. …And the bad news: so are less-than-perfect ones. I don’t know about you, but I’ve certainly cooked my fair share of the latter. When you try to peel away the shell, half the whites come along with it, or when you cut it open, the yolk is slightly green instead of brilliant yellow. Pretty disappointing, if you ask me.
See, cooking perfect hard boiled eggs is easy, but that doesn’t mean that the process you use doesn’t matter. After years of trial and error, I’m happy to say that this method for how to make hard boiled eggs works every time! The yolks are always sunshine yellow, and the shells slide right off. Whether you’re getting ready for Easter, prepping for Passover, or just on the hunt for a protein-packed snack, this easy hard boiled egg recipe is guaranteed to please.

How to Make Hard Boiled Eggs
Follow these simple steps to make perfect hard boiled eggs every time:
First, boil the eggs. Place them in a pot and cover them with cold water by 1 inch. Bring the water to a boil over high heat.

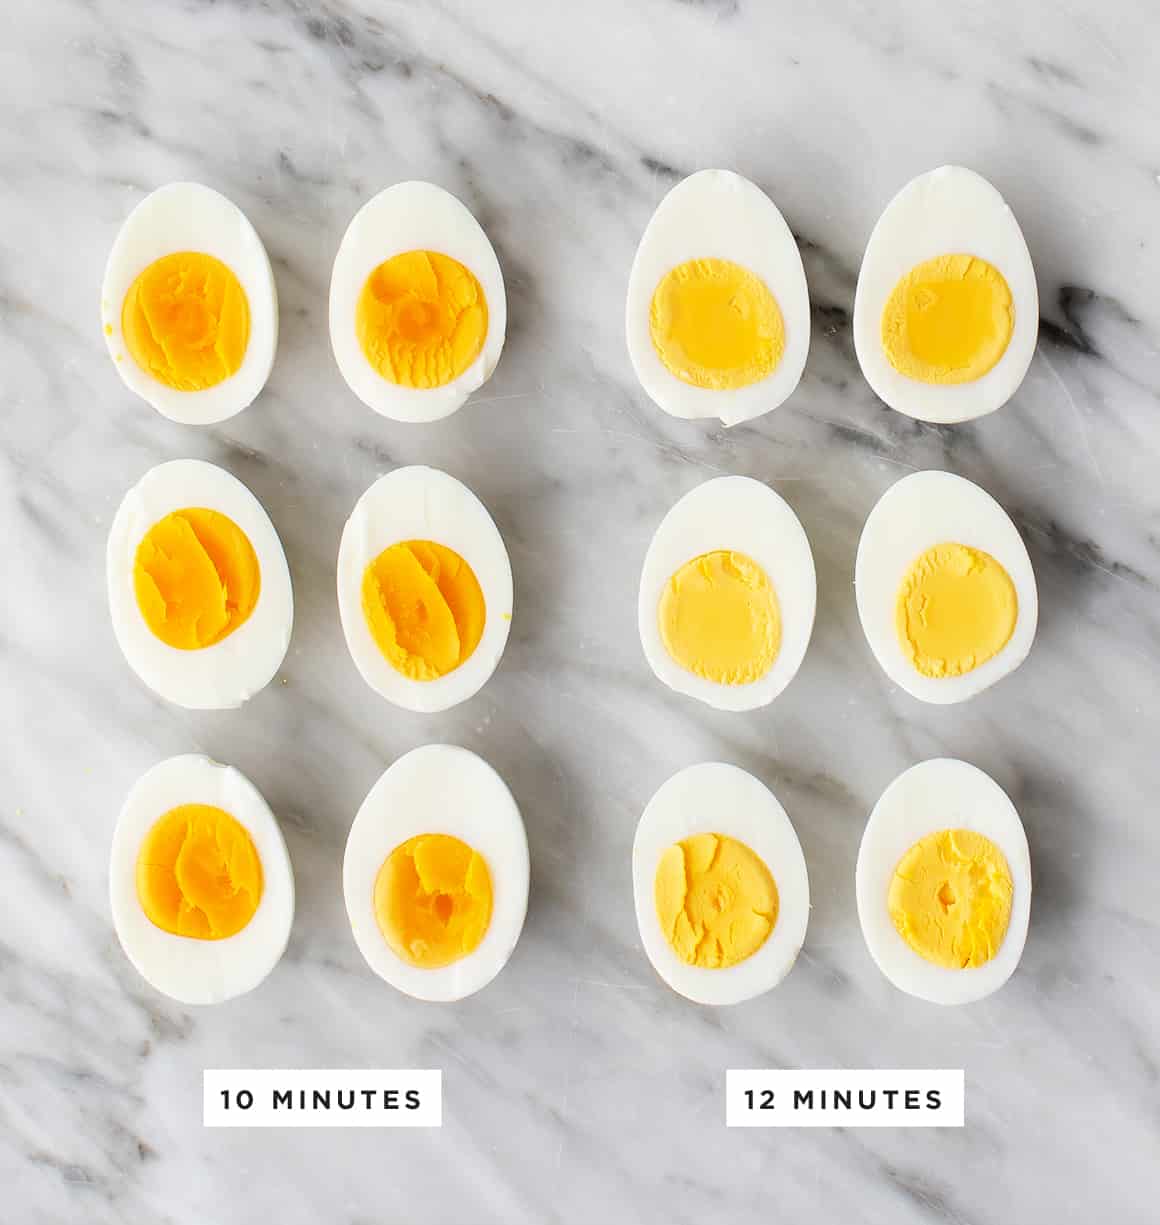
Then, let them sit in the hot water. As soon as the water begins to boil, turn off the heat and cover the pot. Leave the eggs in the hot water for anywhere from 10-12 minutes, depending on how you like your eggs. The 10-minute eggs will have vibrant, creamy yolks, while the 12-minute yolks will be paler and opaque, with a chalkier texture.
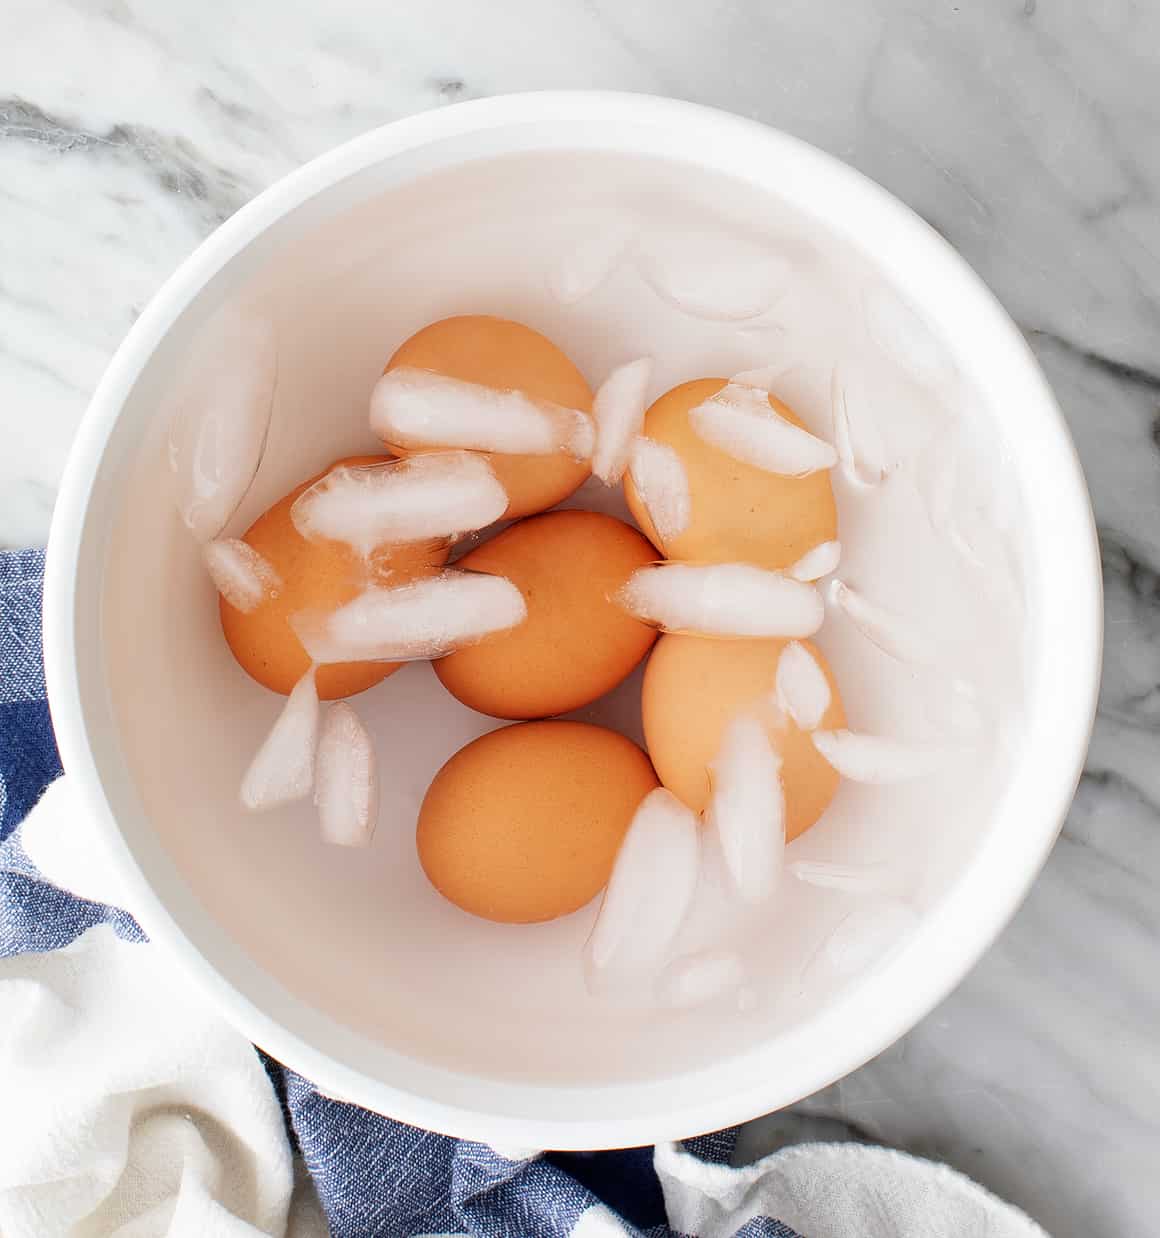
Finally, move them to an ice bath. When the time is up, drain the eggs and transfer them to a large bowl of ice water to stop the cooking process. Leave them in the ice bath for at least 14 minutes before you peel the eggs.
If you’re not planning to eat the eggs right away, feel free to leave them in the shells and store them in the fridge. But even if this is the case, don’t cut the ice bath short! It’s crucial for stopping the cooking process and making the eggs easy to peel later on.
See below for the complete recipe!
Perfect Hard Boiled Eggs Tips
- Buy the eggs in advance. If I’m cooking sunny side up eggs, fresh eggs will yield the best results every time. But if I’m hard boiling them, the opposite is true! Boiled farm-fresh eggs are more difficult to peel than older eggs. If you want to make perfect hard boiled eggs, it pays to buy them in advance and cook them after a few days in the fridge.
- Store the eggs upside down. This tip comes from Jack’s mom, who makes the BEST deviled eggs for family gatherings. In order for the yolks to land right in the center of the hard boiled eggs, she recommends storing the raw eggs upside down before you cook them.
- Don’t skip the ice bath! Overcooked hard boiled eggs have an unappealing greenish ring around the yolks. We want our yolks to come out sunshine-yellow, so transfer the eggs to an ice bath to stop the cooking process as soon as they come out of the pot. This step is also crucial for making hard boiled eggs that are easy to peel. The ice bath helps separate the egg membrane from the shell, so you’ll be able to peel away the shell without ripping off chunks of egg white.
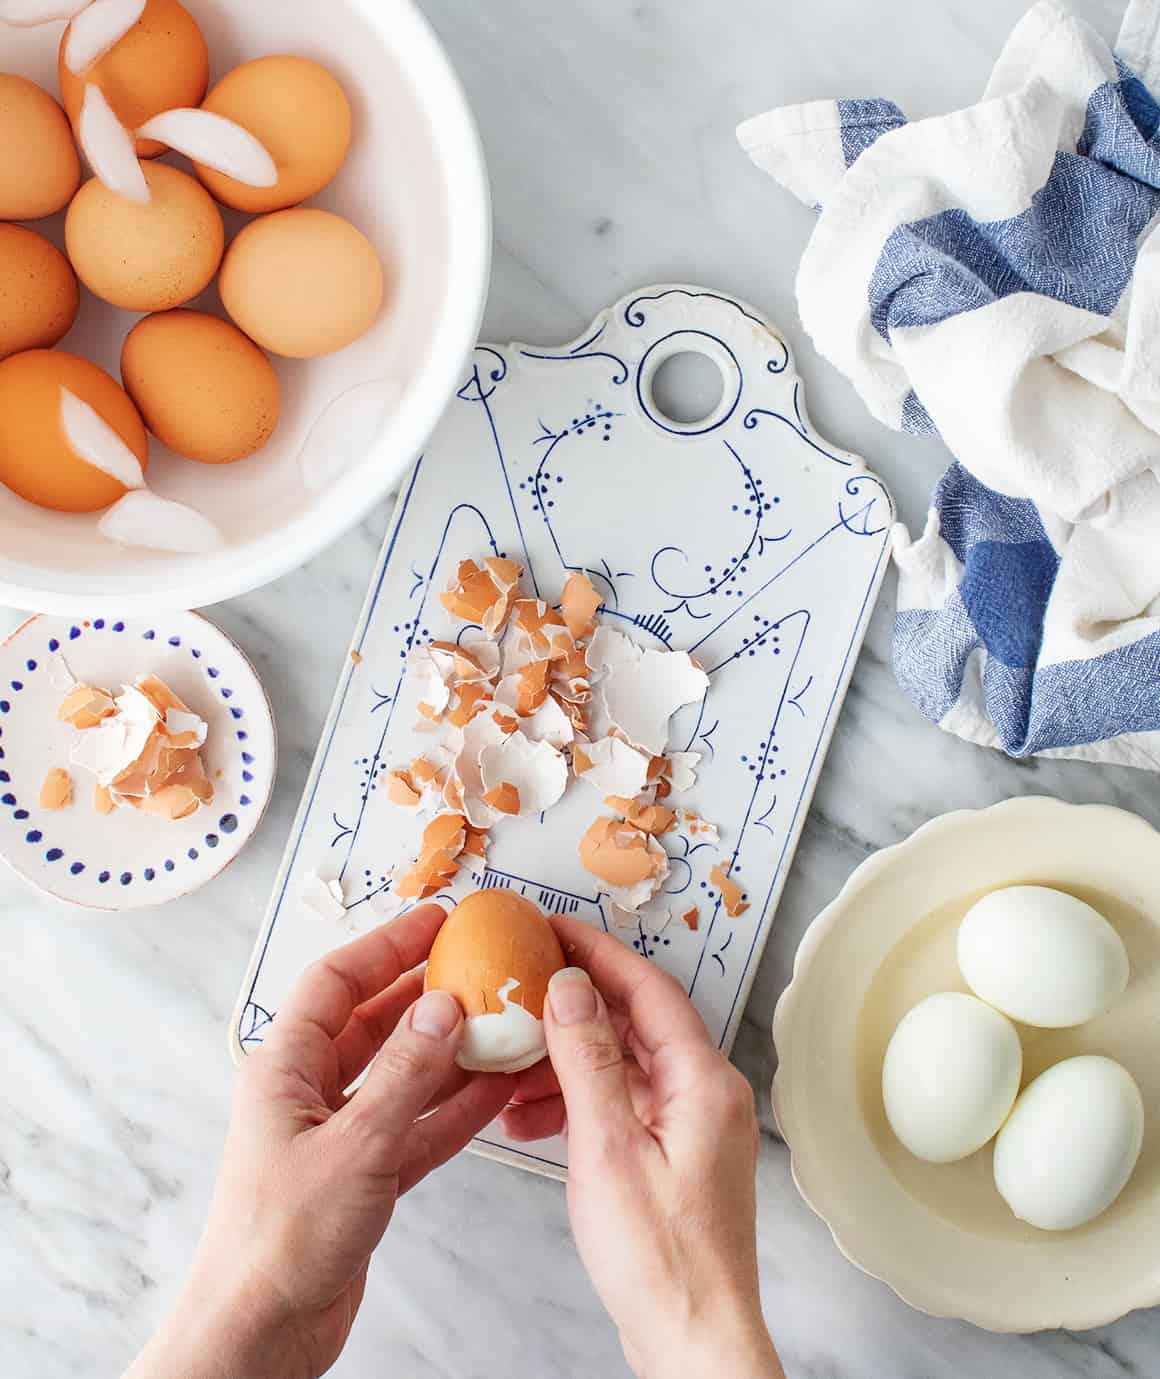
- Peel them carefully. The ice bath should set you up for success here, but that doesn’t mean the shell will all come off in one piece. Gently rap the egg on the counter to break the entire shell into small pieces. Carefully peel it away along the fractures, leaving the egg whites as intact as possible.
Storing and Serving Suggestions
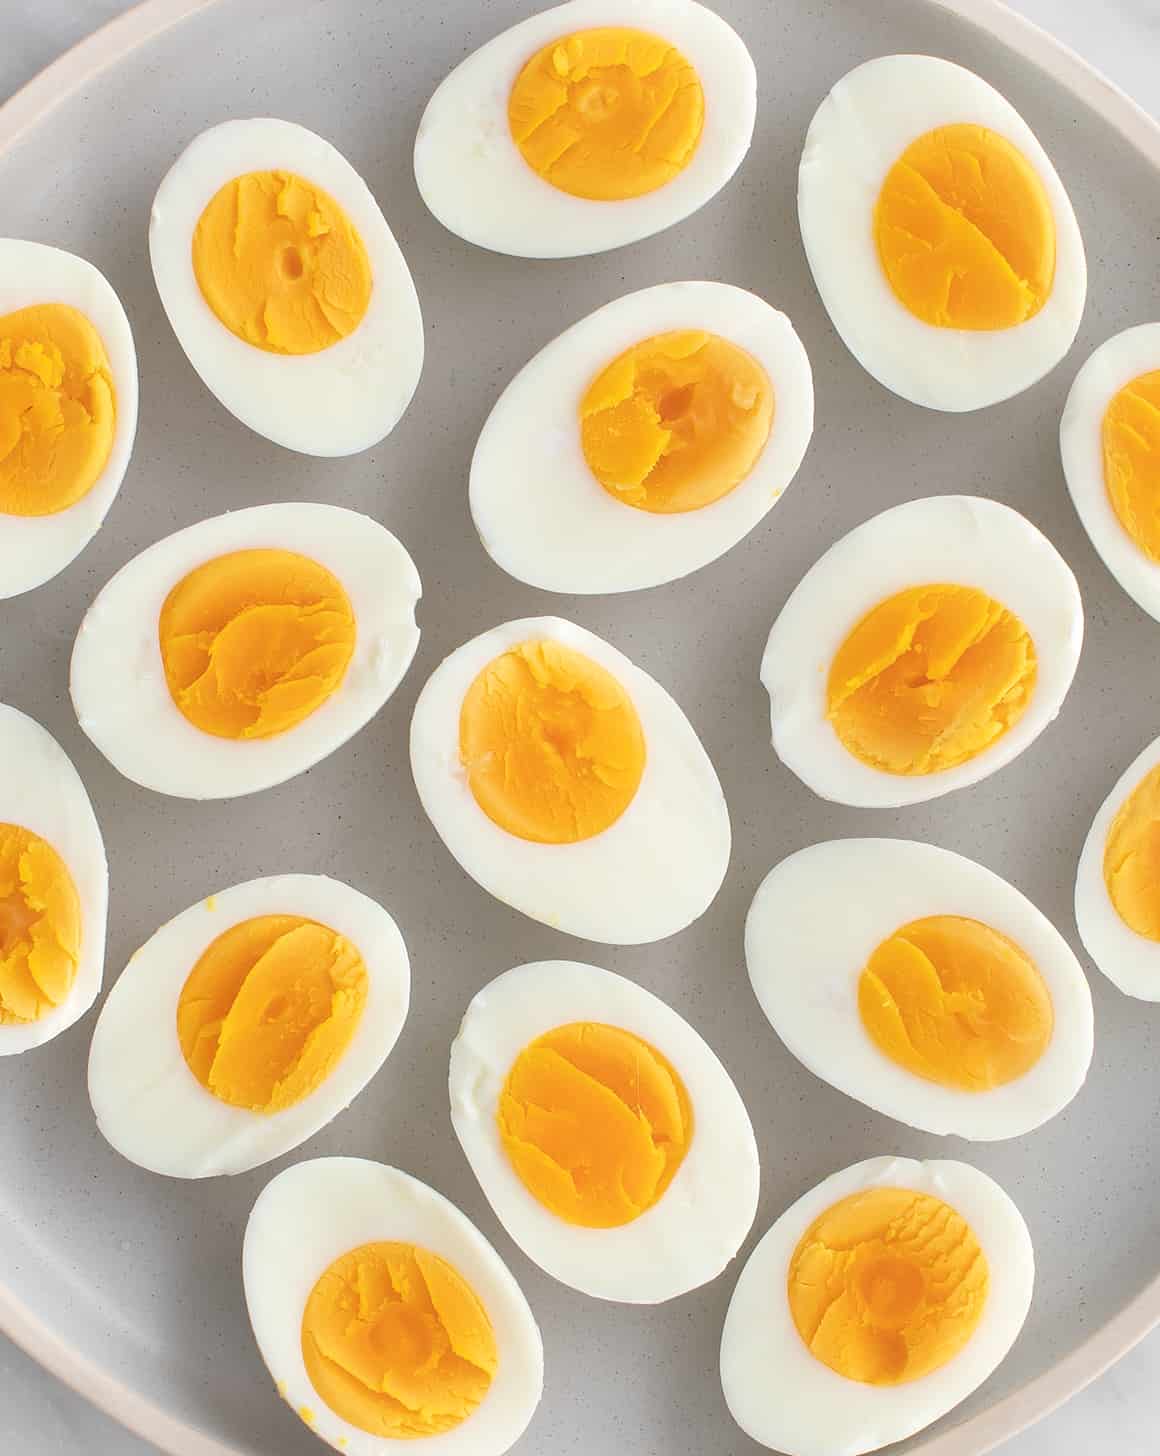
Peeled or unpeeled hard boiled eggs will keep in the refrigerator for up to 5 days. Enjoy them as a protein-packed snack with salt and pepper or Everything Bagel Seasoning, slice them into salads, add them to grain bowls, or top them onto avocado toast. I also love to make hard boiled eggs to turn into deviled eggs, pickled eggs, or healthy egg salad!
How do you like to eat hard boiled eggs? Let me know in the comments!

How to Make Hard Boiled Eggs
Equipment
Ingredients
Instructions
- Place eggs in a medium pot and cover with cold water by 1 inch. Bring to a boil, then cover the pot and turn off the heat. Let the eggs cook, covered, for 9 to 12 minutes, depending on your desired done-ness (see photo).
- Transfer the eggs to a bowl of ice water and chill for 14 minutes. This makes the eggs easier to peel. Peel and enjoy!


I think it should be specified that the pot should be removed from the heat and then covered… my 9-minute eggs were more like a 12-minute egg. I’m afraid to cut open my 12-minute eggs now as I am expecting to see green rings. The problem is that covering them and leaving them on the heat will result in the boiling to not stop!
This was my experience as well. I should have listened to my instinct to remove from the burner sooner than I did because it’s a ceramic top that stays really hot.
I miss my Instapot that recently died! It made the most perfect hard boiled eggs in the easiest, most consistent way.
I love Love & Lemons though, some of then best, most well written, recipes.
I tried the 12 minute method but the color and the softness came out to the 10 minute picture I followed exact instructions but I actually loved the taste was super creamy and delicious thank you so much for this recipe
I’ve always struggled with getting my hard-boiled eggs just right, but this guide from Love and Lemons was a game changer! The step-by-step instructions were easy to follow, and the tips on peeling and storing were super helpful. I followed the method exactly, and my eggs turned out perfectly – easy to peel and with beautiful, creamy yolks. This will definitely be my go-to method from now on. Thank you for making this seemingly simple task actually simple!
Hi Patty, I’m so glad your eggs were perfect!
One suggestion I have, that my grandma taught me years ago, is once you rap the egg shell on the counter, instead of peeling the shell, use a spoon gently slid under the shell and to scoop the shell off. It works amazingly and is much quicker than peeling off the shell. Thank you for this amazing recipe for not overcooking the eggs.
I’m so glad your eggs were perfect – I loved that spoon method, I use it all the time for my soft boiled eggs.
Do I leave the eggs on
the same heated element after I turn it off, or do I transfer them to a cool one for the 10 minutes is my question.
Hi Andre, you leave them on the burner, the residual heat will cook the eggs during the 10 minutes.
What if I have an induction stove? Ive previously done a similar method where you take the eggs off the heat and let cook for something like 16 minutes, I think
Hi Kate, I’ve used this method on an induction stove, and it’s worked really well! I let the water come to a full boil before turning off the heat and leave the pot on the burner while the eggs sit in the hot water. Hope this helps!
I’ve used this previous times, as well as today. I noticed the timing is most accurate when you are using a pan that is effective for heat conduction. (Copper, stainless steel. Not aluminum).
OMG! This is a fricking game changer!
I let them in hot water 11 minutes, 14 to 15 minutes in the icy bath, and they peeled like they worked in a strip club! My eggs were 3 days old, I did put a dash of baking soda in my hot bath. My husband and I eat so much of those, and I use to dread making them, but not anymore! I punched a small hole at the bottom of half of them, but no noticeable difference. Thanks, thanks, thanks! Can I leave 10 stars?
Hi Sandra, I’m so glad you loved them!
I’ve followed these instructions twice. Perfect both times. 🙂 Thank you!
I’m so glad your eggs were perfect!
Boiled one dozen eggs Followed your instructions, these eggs turned out perfect. Thank you so very much.
I’m so glad your eggs came out well!
Thanks that was so helpful – they’ve turned out really well!
After reading this tip below I was left with one question…how do I know what is upside down for an egg?
Store the eggs upside down. This tip comes from Jack’s mom, who makes the BEST deviled eggs for family gatherings. In order for the yolks to land right in the center of the hard boiled eggs, she recommends storing the raw eggs upside down before you cook them.
Store eggs pointy end down. This allows the air pocket on the rounder end to stay put and away from the yolk and the pointy end is stronger if you happen to drop it.
I followed every bit of the instructions and spent an inordinate amount of time trying to peel the eggs while shredding the whites. I was making deviled eggs and 4 were unusable. Maybe it was the eggs. Maybe it was lack of detail as regards “first start to boil.”
Unfortunately, my eggs did not turn out as described. The yolks were accurate at 12 minutes however, I was unable to peel the eggs without great difficulty. Approximately half of the egg whites were lost. I followed instructions as directed. My eggs had been in the refrigerator for two days. Best to all.
I followed the directions and my eggs were perfect!
Jeanine and Jack nailed! By far the best hard boiled egg recipe ever!
I added 3 minutes to the time after you cover and remove it from the heat for high altitude, Denver Colorado. Water boils 10° lower ( 202°).
I also gently crack the eggs by Rolling them on the counter and then peeling under a slow stream of cold water, ideally getting the stream of water to get underneath the thin membrane. Works really well!
I’m glad your eggs came out perfectly!
Getting ready to try these directions for the 1st time. Awesome idea to store the eggs upside down 1st. Can’t wait to see how they turn out.
You still need to leave the pot on the hot burner after turning it off. Also, make sure it comes to a boil (not just little bubbles coming up).
I did the recommended steps and all went well; nicely done.
This has literally nothing to do with the recipe and everything to do with your eggs / peeling method
This is my tried and true recipe for perfect hard boiled eggs every time!
Hi Juliana, I’m so happy to hear!
Followed the instructions exactly and they turned out absolutely perfect. I was nervous because I read the current negative comments while my eggs were in the ice bath but my worried were alleviated when I peeled my perfect egg.
I used week old large brown eggs straight from the fridge.
Waited for boil to begin then turned off right at boiling (as directed)
Let sit with the top on for 11 minutes before the ice bath and the yolks were a texture between the two pictured in the article. Perfect!